
Glute Bridge: Muscles Worked and Best Alternatives
Clear, practical breakdown of which muscles the glute bridge trains, where it fits in a program, and 4 solid alternatives with when to choose each.
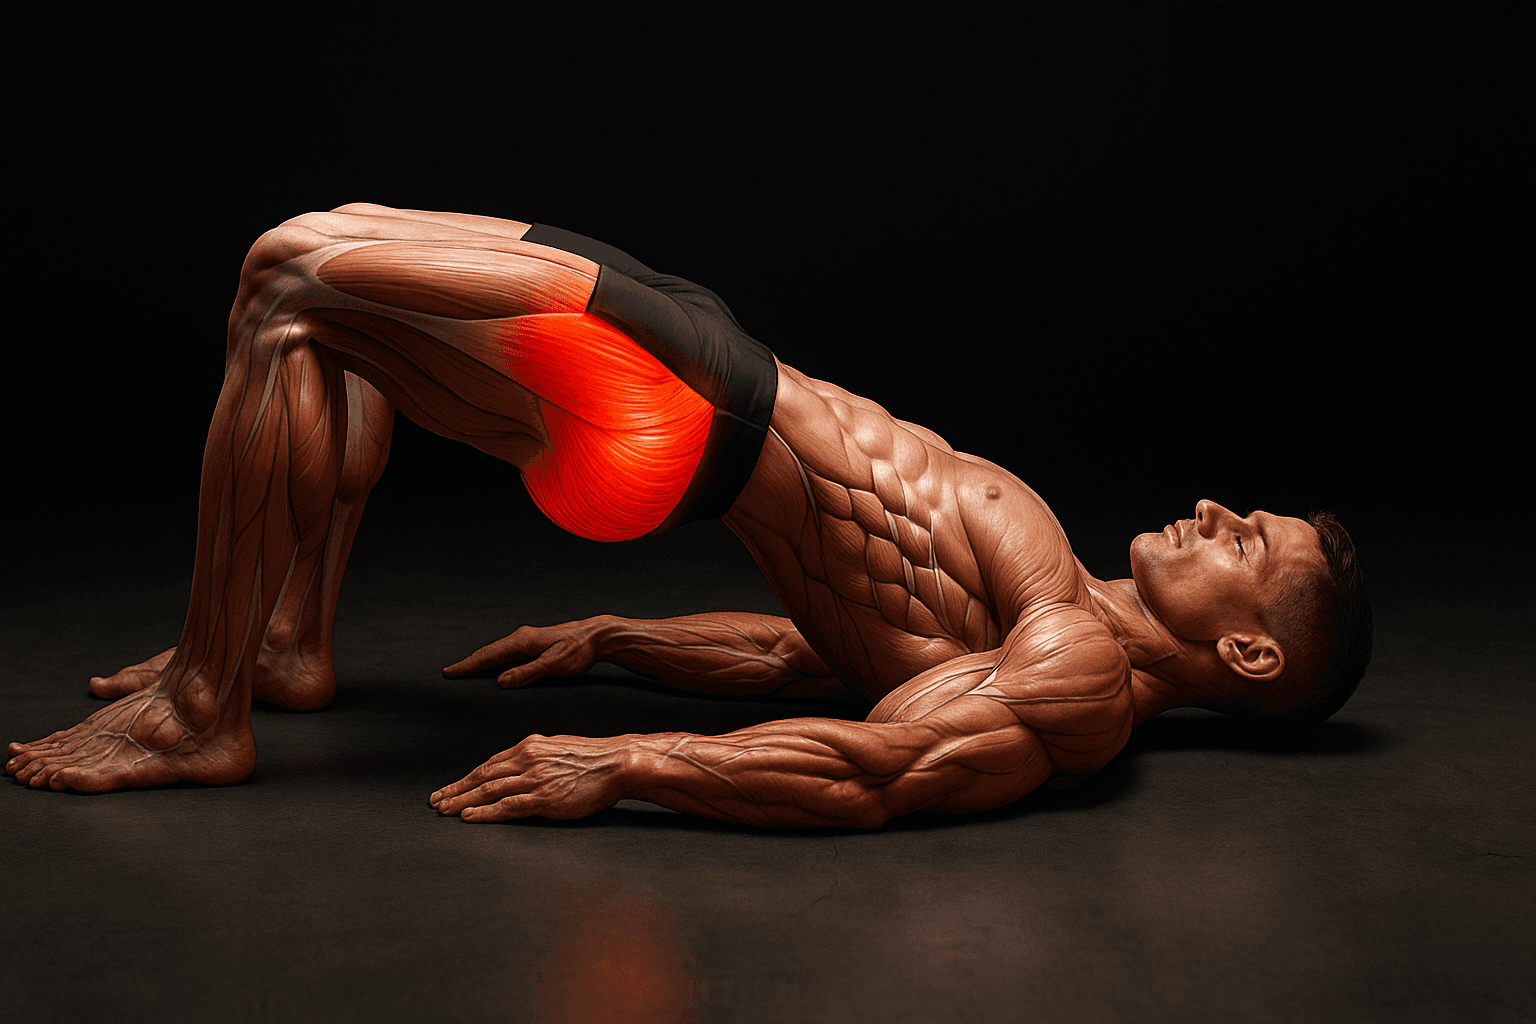
Photo by RepBro.
Glute Bridge: Muscles Worked and Best Alternatives
The glute bridge primarily trains the gluteus maximus (hip extensor) and the hamstrings (hip extensor/hip stabilizer). Secondary muscles include the gluteus medius/minimus (hip abduction and pelvic stability), lumbar erectors (spinal stability), adductors and the deep core (anti-extension). In short: main movers = glute max and hamstrings; stabilizers = glute medius, erectors and core.
What exactly does the glute bridge target?
- Primary: gluteus maximus — the main hip extensor responsible for driving the hips into extension.
- Secondary: hamstrings — assist hip extension and control the posterior chain.
- Stabilizers: gluteus medius/minimus — resist pelvic drop, especially in single-leg variations; lumbar erectors and core — resist unwanted spinal extension.
Mechanics: the exercise is a horizontal hip extension performed from a supine start. Because the torso starts on the floor, range of motion is typically smaller than a hip thrust with elevated shoulders, which changes how load and muscle length are distributed.
Where does the glute bridge fit in a program?
- Role: build hip extension strength and glute activation; useful for beginners, warm-ups, accessory work, or low-equipment sessions.
- Loading guidelines: 3–5 sets of 6–12 reps for strength/hypertrophy emphasis when loaded (dumbbell/barbell); 10–20+ reps for activation and endurance when bodyweight or light banded.
- Frequency: 2–4 times per week depending on total program volume and recovery. Use lower reps with heavier load and higher reps for activation or conditioning.
- Progression: add external load (dumbbell or barbell), elevate shoulders (to increase ROM), slow down tempo (3s up, 1s squeeze, 3s down), or move to unilateral versions.
How to do a basic glute bridge (short form cues and safety)
- Lie on your back, knees bent, feet flat hip-width. Heels ~20–30 cm (8–12 in) from your butt.
- Brace your core, squeeze your glutes, drive through the heels and lift your hips until your torso and thighs form a straight line.
- Avoid overextending the lower back — top position should be a strong hip squeeze, not a lumbar arch.
- Lower slowly and repeat.
Safety note: stop on sharp pain and consult a qualified professional if pain persists. Never force range of motion through discomfort.
When the glute bridge isn’t enough: 4 effective alternatives and when to pick each
Below are practical alternatives with reasons to choose them (equipment limits, injuries, plateaus).
- Barbell Hip Thrust
- Why pick it: allows heavier loads and larger hip-extension range of motion than a flat bridge, increasing progressive overload potential.
- Best for: intermediate to advanced lifters aiming for hypertrophy or maximal glute loading.
- Equipment: barbell + pad and bench (or alternative shoulder support).
- Watch for: correct foot placement and pelvic control; avoid overextending the lumbar spine.
- When to choose: you’ve plateaued with bodyweight/dumbbells on bridges or need a stronger glute stimulus.
- Related comparison: for a direct comparison to the glute bridge see https://www.repbro.app/vs
- Romanian Deadlift (RDL)
- Why pick it: stronger emphasis on hamstrings and posterior chain in a hinge pattern, with more spinal loading than bridges.
- Best for: improving hinge strength, hamstring development, and athletes needing stronger hip hinge transfer to deadlifts and sprinting.
- Equipment: barbell or dumbbells.
- Watch for: maintain a neutral spine and hinge at the hips—not the lower back.
- When to choose: you want to target hamstrings more, or you can tolerate vertical spinal loading and want a carryover to deadlift performance.
- Bulgarian Split Squat
- Why pick it: unilateral exercise that builds single-leg strength, glute and quad balance, and addresses asymmetries.
- Best for: correcting side-to-side differences, improving balance and positional strength for athletes.
- Equipment: bench/platform and dumbbells or barbell.
- Watch for: knee tracking and torso leaning—aim for vertical torso and a strong hip drive on the working leg.
- When to choose: you have unilateral imbalance or prefer a standing single-leg stimulus that also loads the quads.
- Single‑Leg Glute Bridge (or Band-Resisted Bridge)
- Why pick it: minimal equipment required, increases gluteus medius demand, highlights asymmetries, and serves as an effective progression when adding external load isn’t possible.
- Best for: limited equipment (bodyweight only), rehab phases, or targeting unilateral control and activation.
- Equipment: none for single-leg; a mini-band can increase glute medius challenge.
- Watch for: pelvic rotation—keep hips level and controlled.
- When to choose: travel, rehab, or to break a plateau caused by insufficient unilateral strength or activation.
How to choose among these options
- Limited equipment or early-stage trainees: start with bodyweight glute bridges and single-leg bridges.
- Want more load and ROM for hypertrophy: progress to hip thrusts (barbell).
- Need stronger hamstrings and hinge pattern: pick RDLs.
- Need unilateral strength, balance, or quad-glute mix: choose Bulgarian split squats.
- Stuck in a plateau: change the plane (hip thrust vs RDL), alter tempo, or focus on unilateral variants to reveal weak links.
Programming tips and common mistakes
- Avoid short-range sloppy reps. Aim for control and a visible hip squeeze at the top.
- Feet too far forward or back will shift emphasis—experiment to feel the glutes working rather than quads or lower back.
- Combine horizontal (bridge/hip thrust) and vertical (RDL/squat) hip extension work over a training week for balanced development.
- Track progress (load, reps, tempo) — using a tool like RepBro makes small, consistent increases meaningful.
Final safety reminder: if you have an acute injury, sharp pain with movement, or an ongoing condition, stop the exercise and consult a qualified clinician before progressing.
One-sentence takeaway: The glute bridge is a low-barrier, effective way to load hip extension (glute max + hamstrings) and, depending on your goals and equipment, you can progress to hip thrusts, RDLs, Bulgarian split squats or single-leg bridges to add load, address imbalances, or break plateaus.
Frequently asked questions
- Is the glute bridge better than hip thrusts for glute growth?
- Both train horizontal hip extension; hip thrusts typically allow heavier loading and a larger range of motion when done with shoulder elevation, so they’re often preferred for progressive overload, while glute bridges are useful for beginners or when lying flat is more comfortable.
- How often should I do glute bridges?
- 2–4 sessions per week for most people, with 3–5 sets per session depending on volume elsewhere; adjust frequency based on recovery and overall program load.
- Do glute bridges hurt the lower back?
- When performed with neutral spine and controlled hip extension they rarely provoke low-back pain; stop if you feel sharp pain and consult a qualified professional—form or load adjustments usually resolve soreness.


