
Hip Thrust: Proper Form, Step by Step
Step-by-step hip thrust form guide: setup, execution cues, breathing, tempo, rep guidance, common mistakes with fixes. Safety-first; stop on sharp pain.
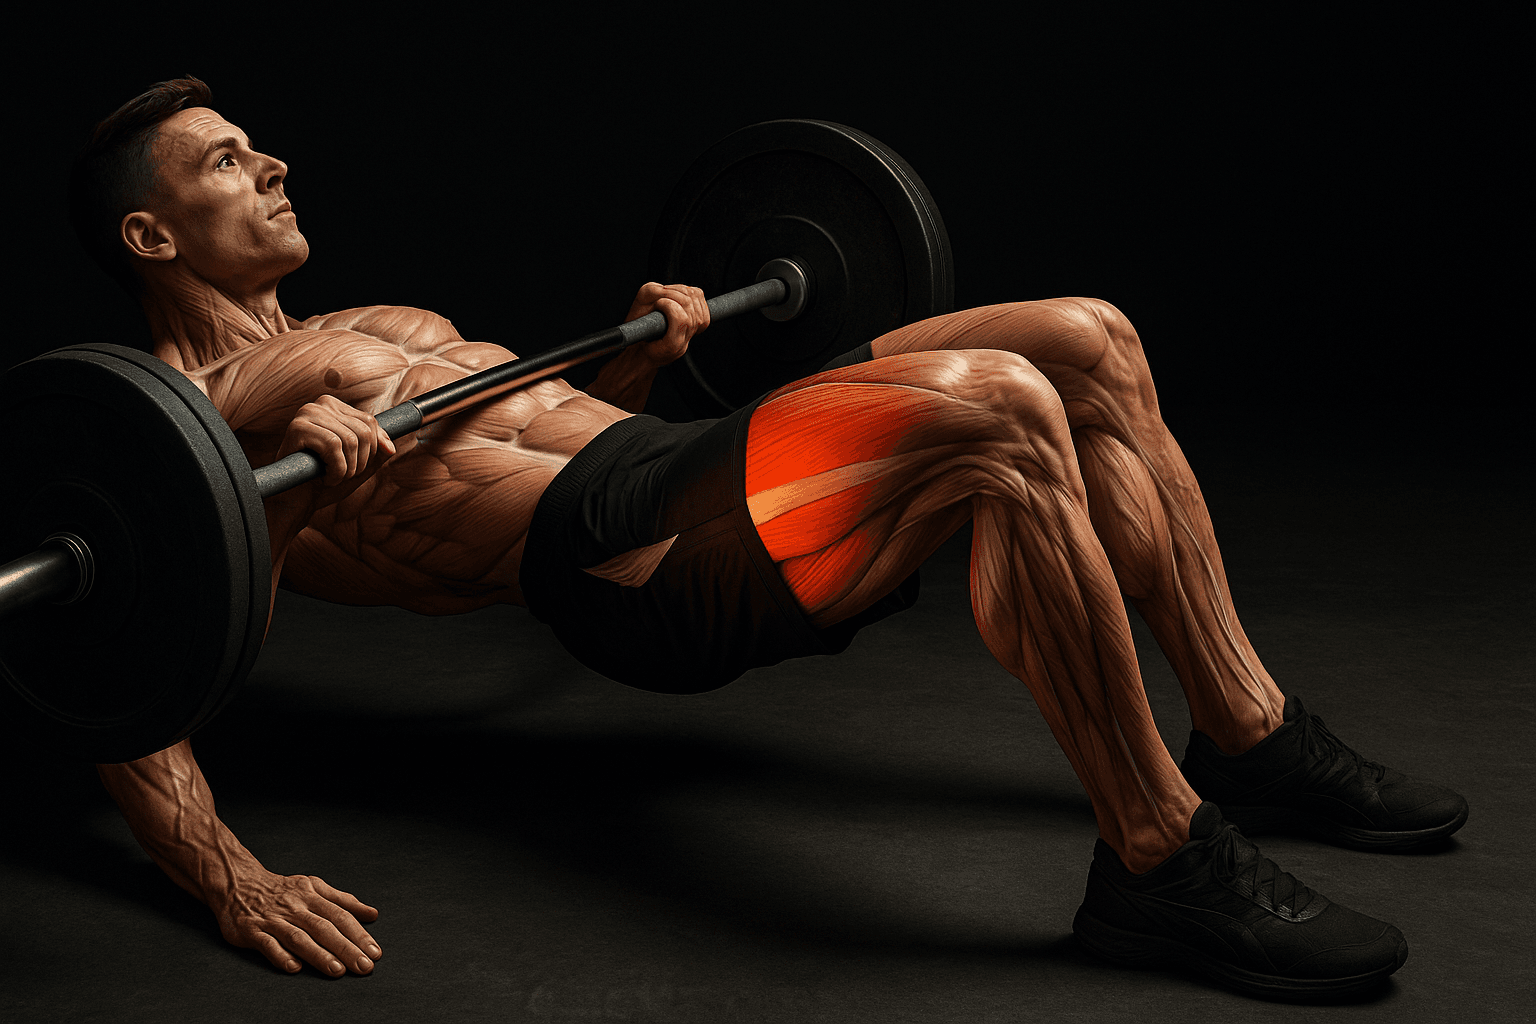
Photo by RepBro.
Hip thrust proper form is a low-back-safe, glute-dominant hip extension performed with the upper back braced on a bench, feet flat, and the pelvis driven up so the body forms a straight line from shoulders to knees. Key: drive through the heels, squeeze the glutes at the top, avoid overextending the lumbar spine, and keep the chin tucked slightly.
What is the correct hip thrust setup step by step?
- Choose your equipment: barbell, safety bar, dumbbell, or hip thrust pad. Start with a light load until form is solid.
- Bench position: place a flat bench horizontally against a rack or spotter. The bench height should let your shoulder blades rest on the top third of the bench when seated; typically 40–50 cm (16–20 in) works for most people.
- Bar placement: roll the bar over your legs and across the crease of your hips. Use a pad or towel to increase comfort and prevent excessive pressure.
- Foot placement: sit with feet hip-width to slightly wider than hip-width. Position feet so knees are roughly 90 degrees at the top of the thrust. For most people this is 30–45 cm (12–18 in) from the hips, but small tweaks fine-tune muscle targeting.
- Body position before drive: upper back braced on the bench, scapulae anchored, chin slightly tucked, ribs down so the spine is neutral, and core tight. Hands hold the bar to steady it, not to pull rhythmically.
How do I execute the hip thrust (cues and checklist)?
- Set: brace your core and inhale gently to create intra-abdominal pressure. Feet flat, weight through heels.
- Drive: exhale and push your hips up by contracting the glutes and hamstrings. Think of pushing the floor away with your heels rather than pulling with your lower back.
- Top position: reach full hip extension until your torso and thighs form a straight line. Squeeze the glutes hard for 1 second. Avoid overarching the lower back; maintain a neutral spine.
- Descent: control the lowering until your glutes touch the ground or reach just short of it. Keep tension in the posterior chain—do not let your hips drop uncontrolled.
- Repeat: maintain the same pattern of breath and tension for each rep.
Quick checklist: shoulders braced, core tight, heels drive, knees stable over toes, chin slightly tucked, pause and squeeze at the top.
How should I breathe and what tempo is ideal?
- Breathing: inhale at the bottom to brace the core, exhale as you thrust up and squeeze at the top. For heavier sets you may prefer a short, forceful exhale on the drive and reset breathing between reps. Never hold breath for prolonged periods beyond what is comfortable.
- Tempo examples:
- Strength focus: 2 s concentric (up), 1 s pause at top, 2–3 s eccentric (down). Reps 3–6.
- Hypertrophy focus: 1.5 s up, 1 s squeeze, 2 s down. Reps 6–12.
- Tempo for novices: 2 s up, 1 s hold, 2 s down until movement pattern is smooth.
Use a metronome or an app to keep consistent timing. Faster reps reduce time under tension; slower reps increase control and muscle activation.
How heavy and how many reps/sets?
- Beginner: bodyweight or light load, 2–3 sets of 8–12 reps focusing strictly on form.
- Intermediate: 3–5 sets of 6–12 reps with progressively heavier loads as long as full hip extension and form are preserved.
- Advanced strength work: 3–5 sets of 3–6 reps with heavier loading, focusing on maximal force on the concentric.
Increase load only when you can perform the prescribed sets and reps without losing spine neutrality or excessive pelvic tuck. Track progression; apps like RepBro help log sets and manage loading.
What are common mistakes and how do I fix them?
Mistake: Low feet or knees collapsing inward Fix: Move feet slightly forward so knees track over the toes; use a mini-band above the knees for cueing and glute activation.
Mistake: Using the lower back to thrust (hyperextension) Fix: Focus on posterior pelvic tilt at the top and actively squeeze the glutes. Tuck the chin slightly and think of bringing the hips between the ribs and thighs instead of arching the lumbar spine.
Mistake: Inadequate range of motion Fix: Lower fully or to the point where tension remains, then drive up explosively. Reduce load if range suffers.
Mistake: Bar rolls or unstable load Fix: Use a pad, thicker grip, or safety bar. Ensure hands only stabilize the bar; do not pull the bar with the arms to press the hips higher.
Mistake: Heels lifting or quad-dominant drive Fix: Shift feet slightly backward and emphasize pushing through the heels. Slightly wider stance can increase glute emphasis for some lifters.
Safety note
Stop immediately if you experience sharp or radiating pain. This guide is educational and not medical advice; consult a qualified professional for persistent pain or injury. Never diagnose yourself from symptoms.
FAQ
Q: Can I do hip thrusts daily? A: Not usually. Muscles need recovery. Most people do hip thrusts 2–3 times per week per muscle group, adjusting volume based on intensity and recovery.
Q: Barbell vs. dumbbell hip thrust—which is better? A: Barbell allows heavier loading and easier progressive overload. Dumbbells are fine for lighter work or when a barbell is not available. For direct comparisons, see complementary resources like RepBro's comparison pages: https://www.repbro.app/vs.
Q: Do hip thrusts hurt the knees? A: Properly set foot position and neutral spine should minimize knee strain. If you feel persistent knee pain, stop and see a professional.
Takeaway: Hip thrusts done with shoulders braced, feet positioned for a 90-degree knee angle at lockout, controlled tempo, and a firm glute squeeze at the top will target the glutes effectively and safely when performed consistently with progressive loading.
Frequently asked questions
- How high should my hips go on a hip thrust?
- Aim for full hip extension where hips are level with shoulders and knees, forming a straight line from shoulders to knees. Avoid overarching the lower back.
- Should I feel the hip thrust in my quads or glutes?
- You should primarily feel it in the glutes and posterior chain. If quads dominate, move feet slightly back and push through the heels.
- How many reps and sets are best for glute growth?
- A common choice is 3–5 sets of 6–12 reps using a load that challenges you while keeping good form. Progress load or reps over time; consult a coach for personalized programming.


